Hot Tub Solar Heat Exchanger System
3/09/11 Update
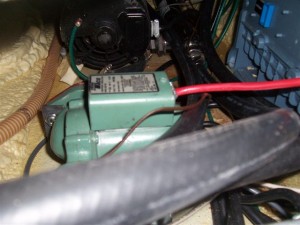
I installed a March pump rated for 4-5 gallons a minute on the hot tub / heat exchanger loop. The pump is inside the hot tub cabinet, below water level, with hose runs of 5′ or less. The amount of water circulating is a lot less than the Taco; I would guess no more than a gallon a minute (if that). I have to say I’m a bit disappointed in the flow, but it seems to work fine. The hot tub is being heated almost 100% by my solar tank. The solar tank has seen a lot of supplemental heat from the wood stove this winter, as our net solar energy this winter has been the lowest in years. A few days ago we had good sun, and the 425 gallon solar tank heated from 100 degrees to 150 degrees in one day. When it works, it really works.
The one nice point is the water is staying crystal clear. Removing the steel fittings and cast iron pump was the answer for clean and efficient hot tub heating with solar.
1/25/11 Update
The hot tub heat exchanger working off my solar tank has worked very well since going live in May, but due to a cast iron Taco pump and some cast iron fittings in the plumbing on the hot tub water side, I’ve encountered some red residue in my hot tub (rust). I should have known better than to place anything in the plumbing for the chemically treated water that would react with the water; heck I was smart enough to use a stainless steel heat exchanger. The first item of business was to remove the heat exchanger and remove the black pipe fittings for the hot tub water side. I replaced them with PVC, which should hold up well to the Bromine (or Chlorine for some).
I also removed a galvanized “T” on the suction side of the system with plastic. The final item to replace is the circulation pump. I have a March “Beer pump” ordered that is made of plastic, and will install that when it arrives; essentially removing any metal of any sort in the plumbing for the chemically treated water side of this system. Well, that’s with the exception of the Stainless Steel Heat Exchanger. I inspected and cleaned that while it was out, and it looked great.
Performance to date;
Other than the rust issue, this system has worked great. During the summer and fall, the solar collector kept the heating elements from running on the hot tub probably 80% of the time. Although I like it hot (105 degrees), I set the tub setting to 100 degrees. My aquastat on the solar tank requires 130 degree water before the pump for the heat exchanger can be activated. Nearly every day I would see tank temps in excess of the minimum temp for the hot tub, and if the tub was heated once a day, the lowest the tub would go was about 103 degrees. Once late fall and early winter hit, our solar for the U.P. tanked. We probably averaged one decent solar day out of every 10. My wood stove connection to the solar tank was my only reprieve. Since my DHW, hot tub, and supplemental heat to the house derives from the solar tank, I’ve been burning a bit more wood the last couple months. I expect to see that drop, as we are already seeing better solar days now as we move into later winter.
Tom
 With several years of experiments with hot tubs and solar collectors, I settled in on a final design for my hot tub utilizing my large solar collector and 420 gallon storage tank. Although I had success with PEX solar panels in the pool solar heating systems, using the cheap plastic fittings and building them in the manifold and riser design, I had poor results with that type of panel once installing glazing. I had one failure myself, and my neighbor John had a significant meltdown of that design. We have since rebuilt John’s using a serpentine design and that system is working nicely now (details to be posted soon). The deciding factor for me was multi-fold. I have excess solar heat in the spring, summer and fall, and I can supplement my solar storage tank temps in the winter with wood when necessary.
Using the solar storage tank water to heat the hot tub brought some other pluses and minuses. I needed to incorporate a heat exchanger, and prior experience mandated it needed to be stainless steel. I would need to use a 2-pump system, one for the storage tank water loop, and one for the Hot Tub loop on the heat exchanger. There were also more controls required (to be discussed later). The advantage was the ability to get rid of the drain back system on the tub, eliminating the CPVC return line running through the side of the tub cover and draining “above” the water line for drain back function. I could plumb the tub water utilizing existing plumbing and inlets/outlets on the tub.
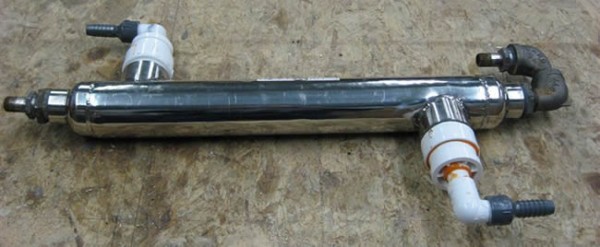
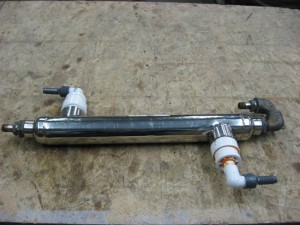
I bought the stainless steel heat exchanger on line from Out Door Furnace Supply www.OutdoorFurnaceSupply.com for $259, and the shipping was included. The service was great, and I purchased Unit # SP-85K-S, which was one of the smallest units. You’ll see later this was plenty sufficient for this application. I purchased a 300’ coil of ¾” PEX from PEX Supply, as well as a couple Taco Pumps and two aqua stats. I needed one aqua stat at the tank, to ensure the water was sufficiently warmer than the hot tub before allowing pump activation, and the other aqua stat for the hot tub, to act as a high water temp limit switch so hot tub temps didn’t climb too high.
The first project was to open up the solar storage tank and install the aqua stat, placing the stat in a location where the sensing bulb could be immersed in the tank water. I discovered at this point that I had purchased the wrong aqua stat for this application, with reverse function, getting a normally closed switch rather than a N/O. PEX Supply was great to work with, and exchanged the stat for me at no charge. I intended to set this aqua stat about 30 degrees above hot tub “desired temp”, as the run was quite lengthy, I was concerned about heat loss along the route, and getting enough temp difference between the storage water and the hot tub water for the system to be effective. Once the stat was installed, I moved to the plumbing up in my basement (remember, my garage and solar storage tank are in my underground garage, which is 7’ below my basement).
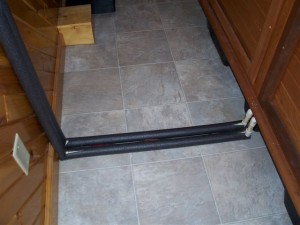
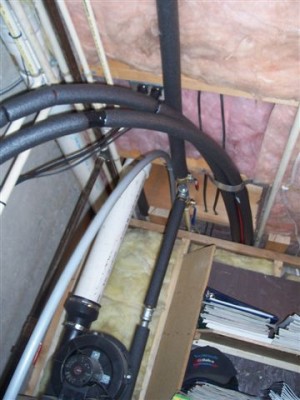
I had to pull ceiling tiles down (luckily a suspended ceiling) along the route the PEX needed to run from the one corner of my basement to the hot tub on the far other side. I mounted the pump and re-plumbed my manifolds for the basement hydronic heat to accept more piping for this project. I already had CPVC plumbing at the tub from a prior “hot tub solar test project” that had previously ran out a nearby window, so all I had to do was rep-plumb everything for better routing and entry to the tub. When we finished my basement years ago, we installed both fiberglass insulation and soundboard, depending on the access, in the ceiling to cut down on noise transfer from upstairs to the basement. While running the PEX through the ceiling, the fiberglass was a constant aggravation, getting in the eyes and all over my head, arms and shoulders. Once the PEX was run, then I installed pre-fit foam insulation over all the plumbing. I had no desire to heat the ceiling during the summer, and was concerned how much heat we would lose in the 150’ run from the tank to the tub.
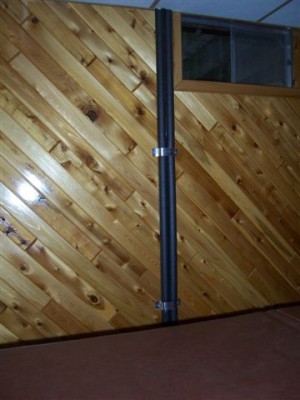
Once the insulation was installed, I installed homemade “strap clamps” to secure the plumbing to the walls and ceiling. A note on the plumbing running down the wall in my finished basement; I located it immediately next to the window so I can install a wider set of blinds that will hide the plumbing when drawn.
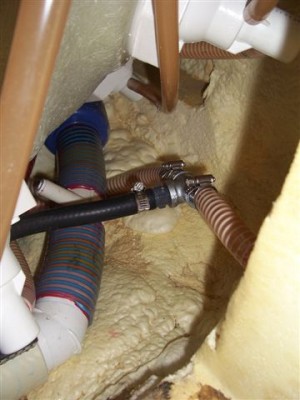
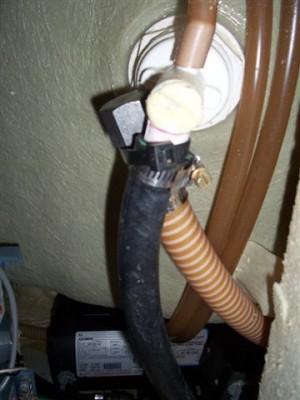
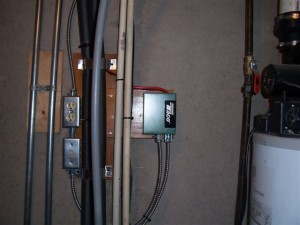
I installed the appropriate fittings in the heat exchanger and installed it inside a fairly tight, but open, area at the bottom of the tub (the pump and plumbing access area, not inside the actual tub). I used a rubberized clamp to secure it tightly to one of the hot tub circulator pump mount bolts.
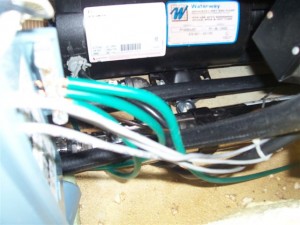
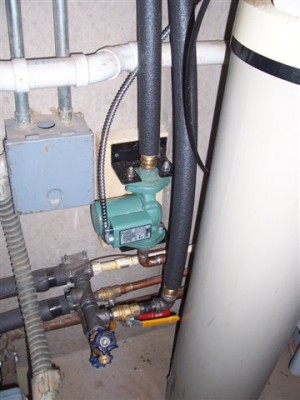
I fabricated steel angle brackets to mount the Taco Pump to the floor of the tub access area, drilling holes in the brackets to facilitate mounting securely to studs already located in the floor.
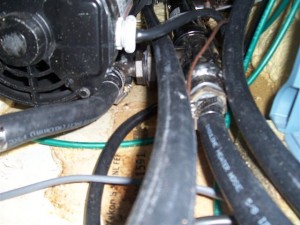
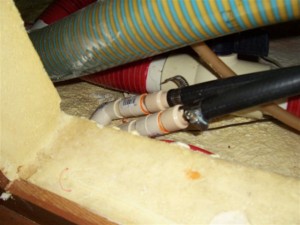
The plumbing for the “hot side”, coming from my solar tank, was run in and out the ends of the heat exchanger. The plumbing for the hot tub side was run from the existing drain hose (between the tub and the drain valve) to one side of the heat exchanger. Hosing continued for that loop out the other side of the exchanger and to the Taco pump. The outlet for the pump ran to a disconnected diverter on the tub (in an almost never used location in the tub).
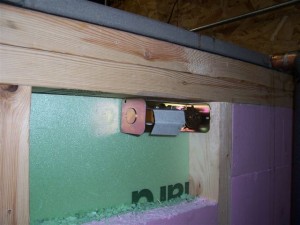
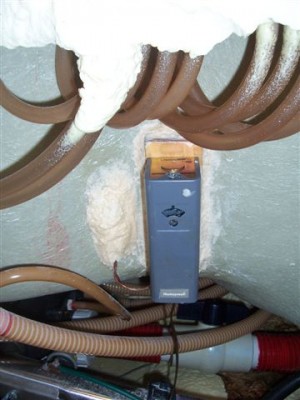
The aqua stat for tub “temp limit” control was a bit trickier. Luckily, “Arctic Spa” utilizes a unique efficiency design that leaves the tub itself un-insulated, applying all the insulation on the enclosure walls (keeps the plumbing warm, and heat from the pumps radiates back into the tub water). I was able to bond a piece of wood to the side of the fiberglass to mount the stat, and then used an epoxy- cotton flox mix to bond the temperature bulb to the tub wall. That worked like a charm.
With everything plumbed, filled and burped, I did a test by jumping juice to the solar water circ pump for a few minutes. I suspected my original hydronic pump located next to the storage tank would need to be running to supply water to the hot tub heat exchanger loop, since the total head from the solar storage tank to the hot tub is about 14 or 15’. I was pleasantly surprised to see the one pump in the basement would circulate on it’s own. I suspect this is because the hydronic loop is a closed loop, with no drain back. I had found out about a month ago that if I didn’t manually close the water valves for the hydronic loop at the manifold in the basement, water was circulating through my fin tube radiators in the basement. I deducted this was due to the same thermosyphon principal we use for thermosyphon solar water collectors; the water in the tank (lower) circulates up to the fin tubes (higher) because they are cooler than the storage tank. The other excitement with that “test” was that the heat exchange, with 135 storage tank temps, was almost too hot to touch. I was pretty sure this project was going to be a success at this point.
The last item to go live was to install the zone switch for the pumps, wire up the pumps and switch, and run the thermostat wiring for the controls between the aqua stats and the zone switch. I wired from the zone switch to the tank stat, back from the tank stat to the zone switch, but continuing the return wire from the first aqua stat to the stat on the hot tub, with the return from the tub going to the other switch control terminal on the zone switch. This meant I needed minimum water temp at the storage tank, AND the need for heat at the tub, before the pumps were activated. With several days of rain lately, and the solar storage tank temp down around 120 degrees, all I had to do now was wait for some sun.
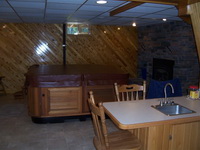 I came home from work the first day after going live at about 3 PM, and we had a partly cloudy day, with about 40% -50% of the amount of solar we get on a good day. In spite of that, my tank temp was up to 136 degrees. I noticed the storage tank aqua stat had not hit the minimum setting to turn the hot tub system on. It is an adjustable stat, so I lowered the temp setting to 130 degrees and the system turned on. I documented the hot tub temp, which was 103 degrees. I checked after 45 minutes, and my hot tub was up to 106 degrees; awesome!!! I left home, and did not return until after 7 PM. The hot tub was no at 108 degrees, heated to that with marginal solar storage water temps. I was ecstatic. Obviously, I needed to adjust the high limit stat on the tub down a bit (did that this AM), but the system works better than I expected. I can’t wait to see how much my electric bill goes down now that I’m not heating the hot tub with an electric heater.
John’s Hot Tub Solar Collector
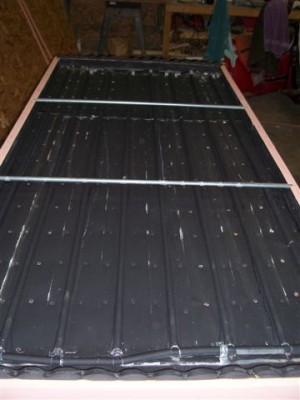
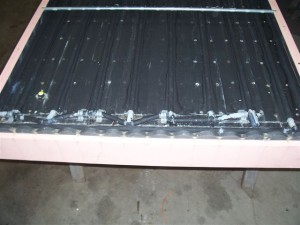
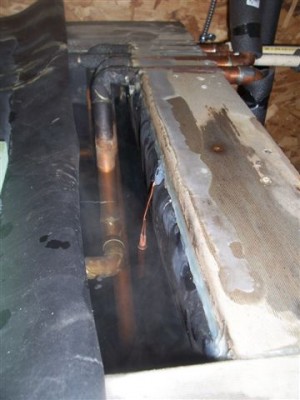
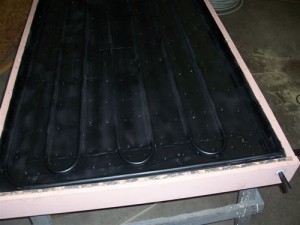
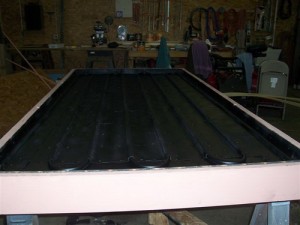
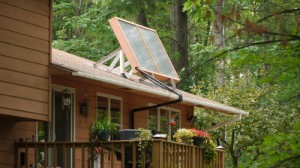
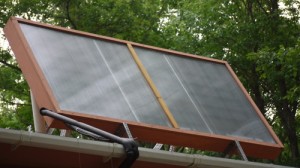
My next door neighbor, John, watched me play with the solar over the last several years and got a bit hooked as well. Watch out, this stuff is addictive! We built and installed a solar collector last fall for his hot tub, but based the design on the cheap pool collector option. That was an unglazed panel for pools, with the cheap “irrigation fittings” to allow for a manifold and riser design. As you can see in the pictures at the top of this page, those fittings, in combination with a manifold and riser, cannot withstand stagnation temps once under glazing, and we had major meltdown. The panel sat open to the weather all last winter, and we finally got around to rebuilding it this early summer. We pulled the absorber off the distorted PEX / fitting grid, cleaned the panel out, and started from scratch using a serpentine design. It was bit more of a pain working with the PEX on the tight radius’s required for serpentine, but once we cut some spacers to lay everything out, it worked well. Every horizontal run pitches upward a bit to allow for good “drain back” function, and the PEX outlet is routed down to near the inlet “inside the panel” after completing it’s circulation run within the panel.
Once the absorber was reinstalled on the panel, we fitted the frame for twin wall polycarbonate. We were not happy with the look or the durability of the corrugated polycarbonate. No testing of the panel was required, as there was not a single connection inside the collector. John re-painted the absorber as required (touch up only), and painted the trim boards (for the glazing) to match the collector. The original color of the collector was selected to match the color of the siding on his home, and it matched well.
John previously installed nice adjustable roof brackets for the original collector installation, and had selected a collector angle of around 35-40 degrees. We felt this may have caused some of the high stagnation temps the earlier panel experienced, so he adjusted his mount for a much steeper angle for better winter solar gain, and a bit less in the summer. We didn’t put an angle meter on the collector, since he had pretty much maxed out the angle available without completely re-doing the brackets. I would estimate he’s between 70 and 75 degrees. The rebuilt collector was also mounted horizontally (the earlier one was vertical), since in a serpentine design, it was more beneficial to have long runs and less 180 degree reversals with the PEX.
A crew of 4 of us hoisted the collector up on the roof, and mounted it permanently. John left the glazing off until he was able to complete the plumbing and test run the system. He installed a Taco circulation pump appropriate for his lift (head), and that is controlled by a simple snap switch. Unlike larger solar collector systems, his hot tub temp will never exceed the “snap switch” engagement temp of 120 degrees. With some systems, this can be a problem, as the warm water in the tank can “fool” the snap switch that the absorber is still in the sun. The absorber will conduct heat both ways; from the sun absorbed flat area to the tubing (as designed), or from the tubing (circulating hot water from the tank) to the absorber, and eventually the snap switch. To keep the system simple, John has the circulation pump running at any time the snap switch senses heat, regardless of tub temp. Since he only has one panel for 350 gallons of water, it’s rare that the output of the panel will bring the tub above a tolerable temp for his wife Joyce. She loves it hot, and John keeps the tub thermostat at 100 – 102 degrees, depending on expected use.
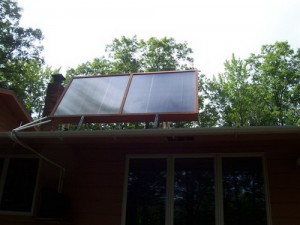 Once all the plumbing and controls were tested, John closed up the panel and insulated his piping. With “Drain Back”, the return line MUST discharge ABOVE the water level. This allows the entire plumbing circuit and the solar collector to drain once the panel is not making heat. His pump is located in the hot tub enclosure, where the tub dissipates enough heat to keep the plumbing from freezing. There should be no issue with the pump freezing if his existing plumbing has never froze. We are located in the Upper Peninsula of Michigan, so we see freezing temps from September to early May that create this concern.
Results to date;
Production has been a bit lower than hoped, but this is not the fault of the system. John’s yard has quite a few large oak trees restricting sunlight during the summer. A few of the trees have encroached his home enough to require removal. They are close enough, and large enough, to significantly damage his home if a storm was to take them down (one even has a large split rendering it vulnerable to this). Since we have a bug killing the oak in our area, (recent cut or damaged wood supports them) the trees cannot be removed until the weather cools off sufficiently in November. We will remove those two trees, and the leaves falling off the remaining oaks will allow a decent solar gain “window” for his location. At this time, he’s seen one degree temp gains per hour in the short window he has for solar exposure at this time (rarely more even an hour). Needles to say, John and Joyce are anxious for the leaves to fall and those two trees to be removed.
